

Easy TLS React Development Environment
If you are serious about security then everything should be running over TLS for obvious reasons. Running a development environment with TLS enabled so you can run ‘like Production’ should also be the norm and thankfully it’s easy to set up in a Create-React-App (CRA) based project with minimal effort.
I don’t do this on small projects normally myself as, and I’m sure most people would probably agree, it sounds like unneeded hassle that slows development down. However, I’ve recently been integrating Auth0 into a small CRA project and discovered that consent flows don’t work fully using the host name ‘localhost’. You can use a custom host name instead by adding an entry in /etc/hosts but even this doesn’t solve the situation if you aren’t also using HTTPS/TLS as you then get a security warning. So setting up TLS on dev it is then…
Agenda
- Set up domain to resolve to localhost
- Generate TLS certificates
- Configure CRA project
- Configure Node (Express) services
This is not going to be a walk-through creating the apps from scratch so you’ll have to apply these changes as you see fit, but it’s pretty straight forward so don’t fret.
My project file structure has a simple layout:
/app
  /auth
    /tls-certs // I store my TLS certs here
  /services
    /user-service // My backend Express based services
      app.js
    /other-service
      app.js
  /ui // My CRA project
    /components
    /redux
    index.js
    package.json
Set up domain to resolve to localhost
First thing to do is ensure you can resolve your domain name locally for local dev work.
This means adding it to the /etc/hosts file as you see below (for mac or linux).
127.0.0.1 localhost mydomain.com
That should mean that when you enter mydomain.com in your browser it resolves to 127.0.0.1 - your machine.
Generate TLS Certificates
Using self-signed certs is not an option as it causes more problems so we’re going to create our own Certificate Authority (CA) and use it to sign our certs. Luckily there any many more tools for doing this than there used to be, I found one called Minica which does all the hard graft for us.
I installed Minica using Brew and then:
$ cd /app/auth/tls-certs
$ minica -ca-cert mydomain.com.ca-cert.pem \
         -ca-key mydomain.com.ca-key.pem \
         -domains mydomain.com,dev.mydomain.com
Minica generates a root CA cert (“…ca-cert.pem”) with associated key (“…ca-key.pem”) and also a new directory containing a signed (leaf) cert and associated key for your domain too. If you supply multiple domains as in my example then the additional domains are added to the one cert so you can use the cert for mydomain.com and also dev.mydomain.com.
We will use that signed leaf cert later when we configure our Express services, however we need to create one more cert to be used by the CRA project. This involves concatenating the leaf cert, key and the root CA cert to form a certificate chain (I can’t remember where I found out why it’s needed and how to do this but believe me it works).
$ cat mydomain.com/key.pem \
      mydomain.com/cert.pem \
      mydomain.com.ca-cert.pem > mydomain.com/chain.pem
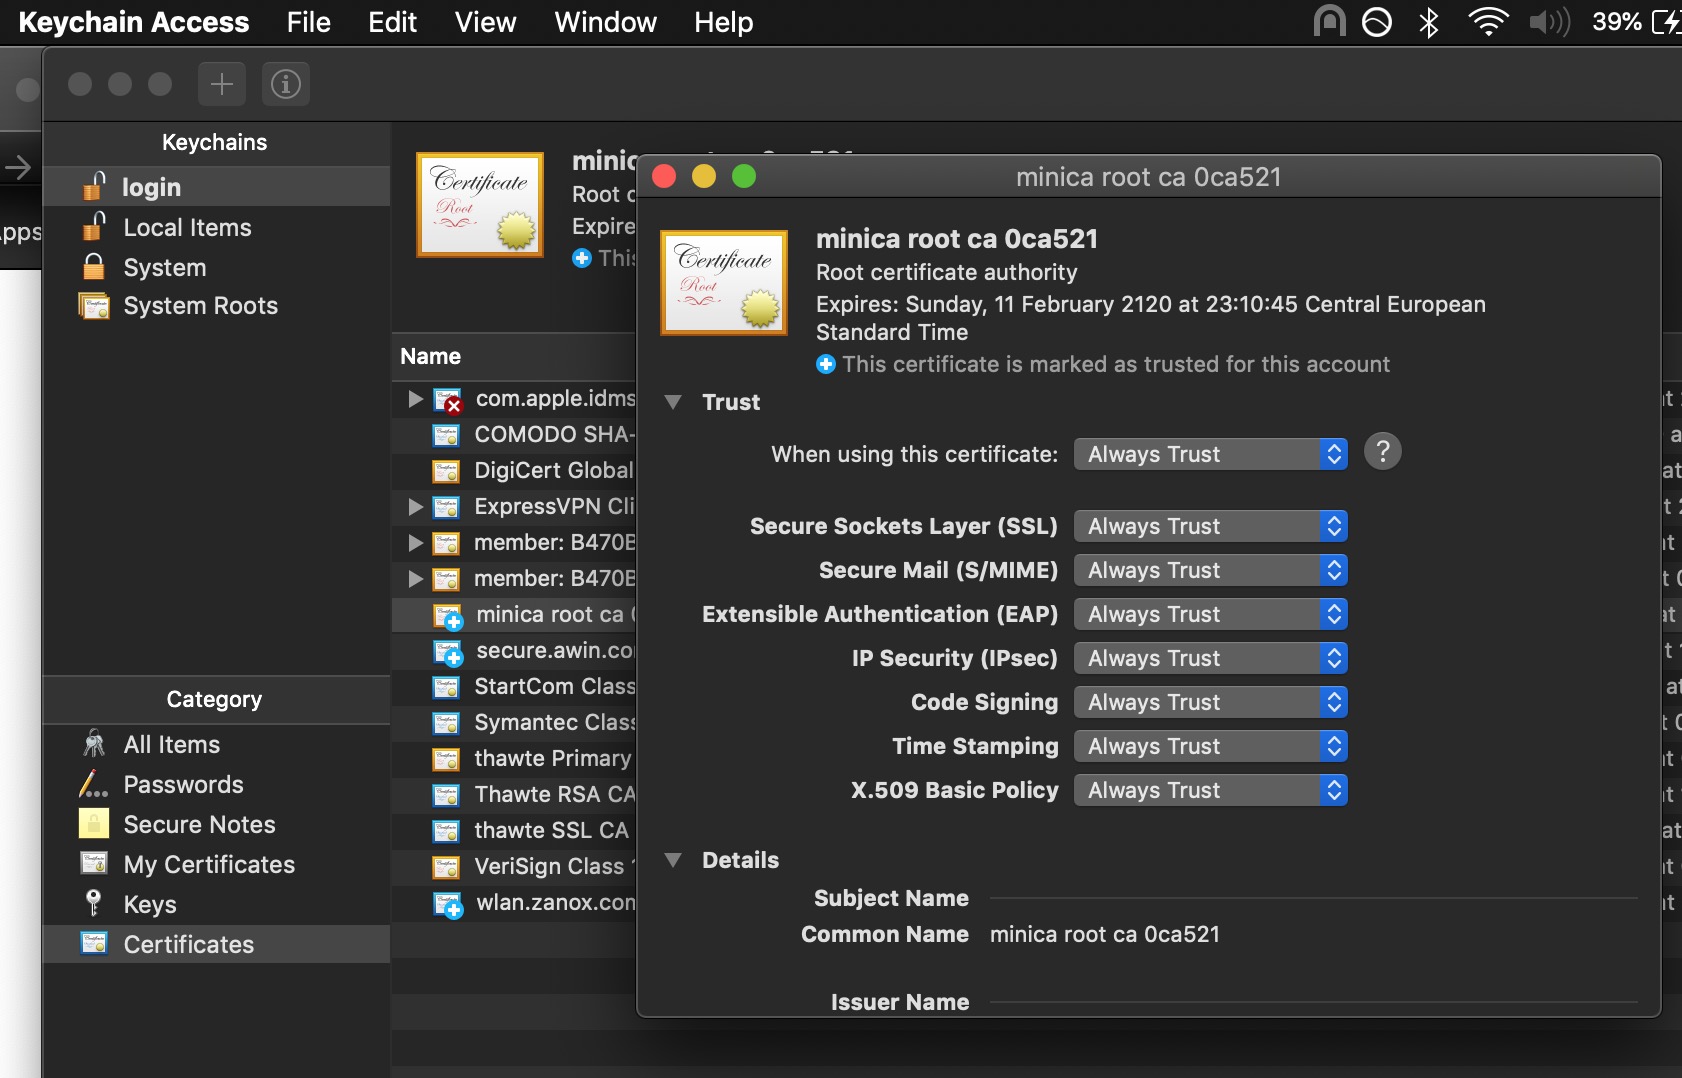
Trust the root CA cert
In order for your browser to show that all important lock symbol and trust your certificates, you need to tell the OS to trust your new root CA cert. On mac you can:
- Find the root CA cert in Finder and double click it.
- It should open Keychain Access and allow you to install the cert.
- Once you have installed the cert, within Keychain Access you need to click on it, open the trust section and set the options to ‘Always Trust’ like you can see in the image below.
Configure CRA project TLS
Enabling TLS in a CRA project is fairly simple, you just need to add the following environment variable to your config:
HTTPS=true
PORT=3000 // You don't need the port but I have it here anyway
This only enables a self-signed certificate though which is never a great experience so we need to switch that out for the ‘chain’ cert that we created above.
Re-configure TLS cert
I made a new command in my package.json which switches out the self-signed cert that is automatically generated in our CRA.
"configure-certs": "rm -f ./node_modules/webpack-dev-server/ssl/server.pem && cp -f ../../auth/tls-certs/mydomain.com/chain.pem ./node_modules/webpack-dev-server/ssl/server.pem",
You need to run $ yarn configure-certs after every install you perform as the cert gets replaced.
After doing the above (and restarting your CRA project) you should be able to view your site with TLS enabled by visiting: https://mydomain.com:3000. Your browser should show the lock symbol confirming the signed certificate is trusted (if not then you probably need tell your OS to trust the root CA cert, see above).
Configure Node (Express) backend services
For my backend services it’s a more straight forward affair. A few simple changes are needed for the Express app.
I add a few environment variables:
TLS_CERT_FILE=mydomain.com/cert.pem
TLS_KEY_FILE=mydomain.com/key.pem
…and then configured my server initialisation code as follows (these are extracts):
const express = require('express');
const https = require('https');
const path = require('path');
const fs = require('fs');

const app = express();

const certPath = "../../auth/tls-certs/"

var httpsOptions = {
  key: fs.readFileSync(path.join(certPath, process.env.TLS_KEY_FILE)),
  cert: fs.readFileSync(path.join(certPath, process.env.TLS_CERT_FILE))
};

const port = normalizePort(process.env.TLS_PORT || '443');
app.set('port', port);

const server = https.createServer(httpsOptions, app);
You basically just create a server using the https module and pass it the cert and key files as options. Bam.
Hopefully now you have both front and back-ends running with some sweet TLS love.
Troubleshooting
If you see this error when you start your app:
$ react-scripts start
Attempting to bind to HOST environment variable: mydomain.com
…then you need to configure your domain to resolve locally. Follow the first step above “Set up domain to resolve to localhost”
Leave a comment