

Fixing my Herman Miller Aeron Chair
After nearly 10 years my Herman Miller Aeron chair finally developed a problem. I’ve been sitting very comfortably on this second hand purchase for quite a while so a problem after this amount of time is to be expected I suppose.
The chair now sinks while I’m sat down. It slowly lowers on it’s own until it reaches the lowest possible setting, so impractical for normal use at my desk. After a little research I learned that this problem is very common across office chairs that utilise gas cylinders for raising and lowering the seat height. The solution is to either recalibrate the gas cylinder controls on the chair, or if that doesn’t work, replace the cylinder itself.
It might seem a little bit daunting at first, messing around with what is a fairly expensive chair (new at least). But having gone through it now I don’t think anyone should be overly concerned, the designers did a good job on making the chair easy to adjust or take apart/reassemble.
First thing to check
Before buying a new gas cylinder the first step is to adjust the “set screw”. This is a simple bolt which you turn using an allen key (hex wrench). By turning the set screw, you are re-calibrating the point at which the chair activates the gas cylinder. Over the years the gas in the cylinder can degrade or leak and needs adjusting. Below is a video explaining how to do this.
Replacing the cylinder
If the video above did not resolve the problem then you should go and purchase a replacement cylinder which is easy to find on online.
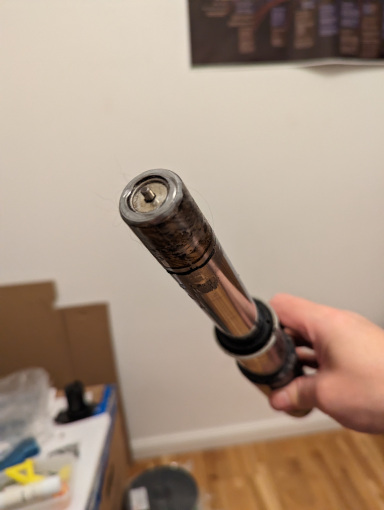
I bought this one on Amazon (German site) for my size B Aeron classic (older version) and so far it works fine. The button on the top looks different to the previous one I had, but as I purchased second hand, I know not if that was an original part. Pictures below show my original cylinder which you can see differs a little from the Amazon link.

Removing the old cylinder
Once you get your new cylinder delivered, it’s time to get the old one out, and this is probably the hardest part of the job. Most of the advice online advises the use of a very large pipe-wrench which most people don’t have lying around. Some cylinders seem to come with a bracket to aid removal which is pretty cool and is a better choice. I didn’t see the bracket option until after I purchased the new cylinder and was really struggling to remove the old one using a smaller pipe-wrench. But, I found a great idea in the below video which suggests hitting the cylinder from above. This worked well for me and was A LOT EASIER than the pipe-wrench.
Following this video I managed to knock my cylinder out pretty easily and I was soon back on my way to getting the chair back to working order. I inserted the new cylinder to the seat and base and then just needed to make sure the controls to raise and lower the seat worked. This needed adjusting, but we did this before and so I knew to adjust the set-screw like in the first step. I got a bit cocky here though and forgot the new cylinder would probably have more resistance, turning the set-screw clockwise multiple times only to hear a snap!
!!! BE CAREFUL not to over tighten the set screw !!!.
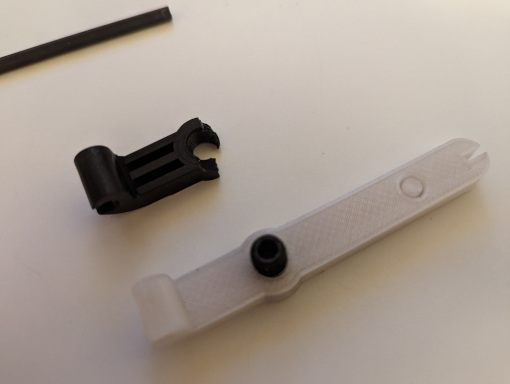
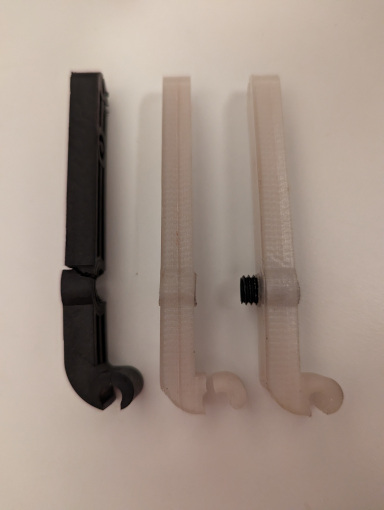
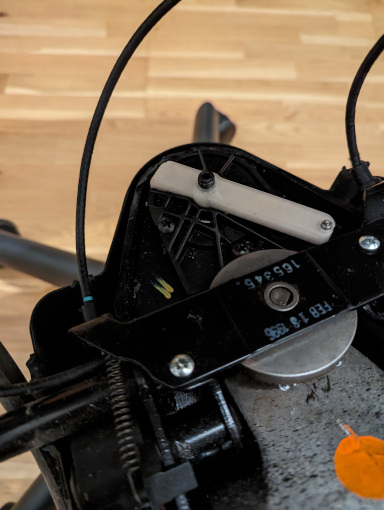
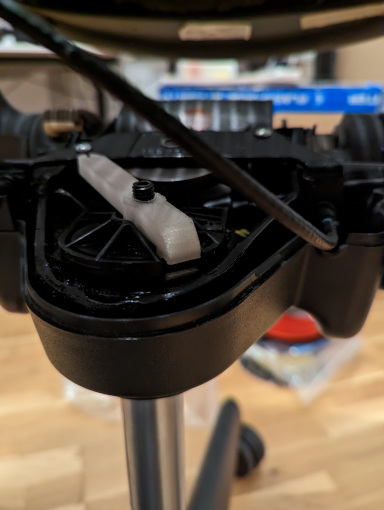
Printing a new cylinder actuator lever
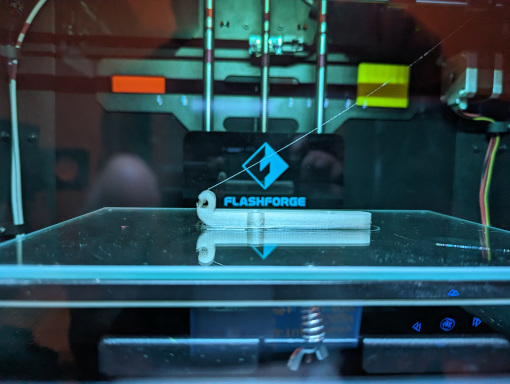
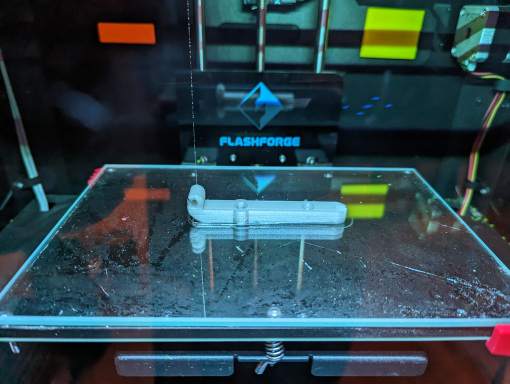
Searching for a replacement part proved difficult, there were a few about but not in Germany where I live. Luckily I have a 3D printer and some amazing person has created and uploaded a design to Thingiverse! I downloaded it and printed out a new part immediately.
The first part I created snapped fairly quickly but after adjusting the printing settings second time around, I ended up with a new lever that worked well. I added the part I made to the Thingiverse page so you can check my settings on there if you are interested.
Leave a comment